Showing posts with label 2015 Quilts. Show all posts

Wednesday, June 17, 2015

Deco Foil Star Table Topper tutorial

Deco Foil Star Table Topper tutorial

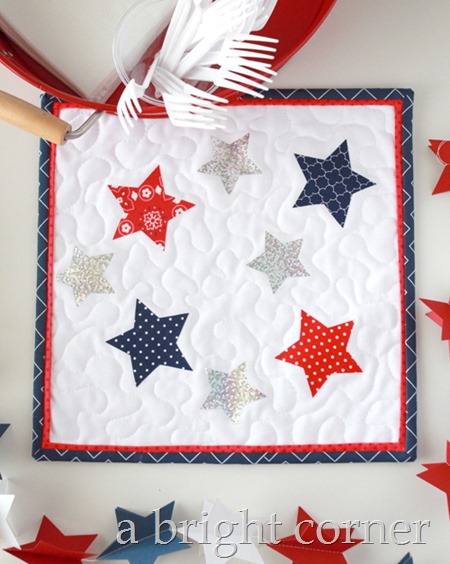
Summer is in full swing around here and we are counting down the days to our family’s annual Cul-de-sac of Fire celebration (a.k.a. 4th of July fireworks with extended family.)  To add to our July decor around the house I’ve made a sparkly star table topper using the Silver Star color of the iCraft Deco Foil. 

The Deco Foils were fun to work with!

Deco Foil table topper tutorial

My tutorial is over on the Therm O Web blog today – go check it out!

star table topper tutorial

Monday, June 8, 2015

Play Ball! A Quilt Tutorial

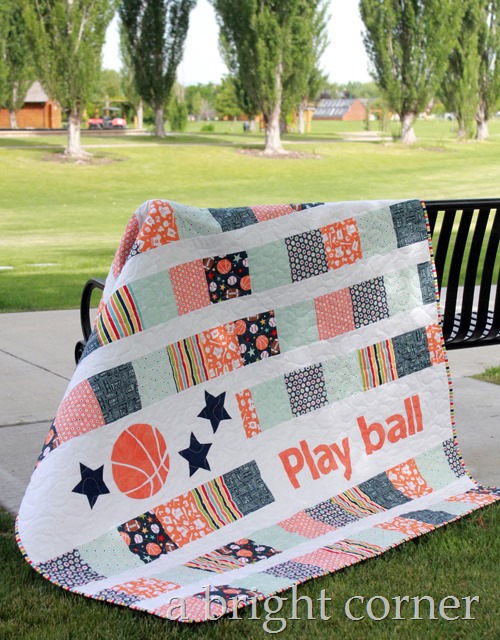
I spent part of last week working with the fun "Play Ball" fabric line from Riley Blake.  I love taking a straightforward quilt pattern and adding in some personality with a bit of applique.  For this quilt I take inspiration from the fabric and add a basketball and some stars along with the phrase "Play ball" - but you could also swap in a child's name there to personalize it!
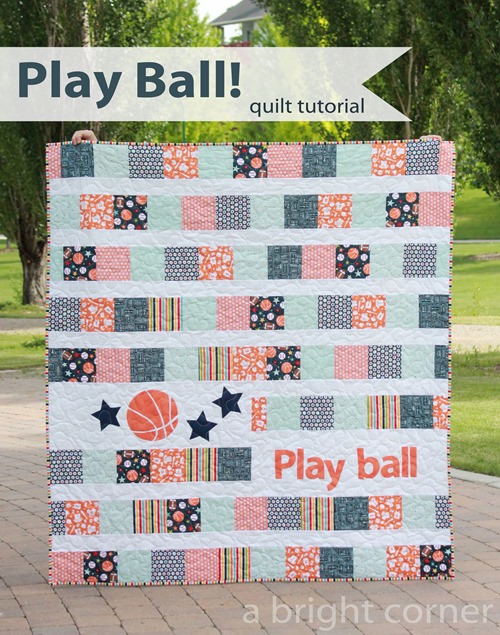
Play Ball quilt tutorial
Finished quilt measures 60" x 65"

Supplies Needed:
1/3 yard each of 8 Playball prints:  Playball Main Navy, Playball Uniform Orange, Playball Ticket Aqua, Playball Ticket Navy, Playball Stripe Multi, Playball Star Navy, Playball Geo Aqua, Playball Geo Orange
1/2 yard Heat n Bond Lite
1/6 yard solid blue for stars (or use scraps)
1/4 yard solid orange for ball and letters
1/2 yard binding (Multi Stripe)
1-1/2 yards of solid white
3-3/4 yards of backing fabric
Batting (68" x 73")
Play Ball applique templates
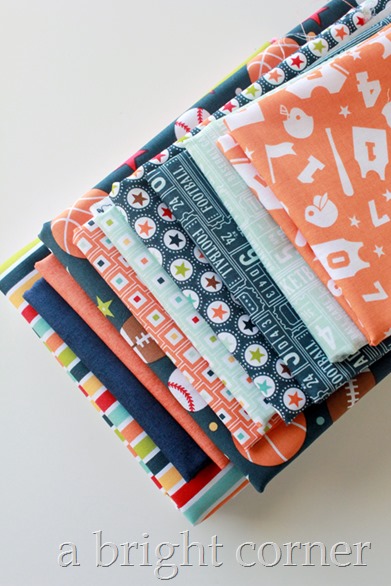
Play ball fabric

Cutting Instructions:
From each of the 8 main prints, cut:
2 @ 5.5” x WOF.  Subcut into 12 @ 5.5” square (need 96 total)

From the solid white cut:
8 @ 3” x WOF
2 @ 3” x WOF.  Subcut 1 @ 3” x 30” and 1 @ 3” x 30.5”
2 @ 10.5” x WOF.  Subcut 1 @ 10.5” x 30 and 1 @ 10.5” x 30.5”
Play Ball quilt tutorial

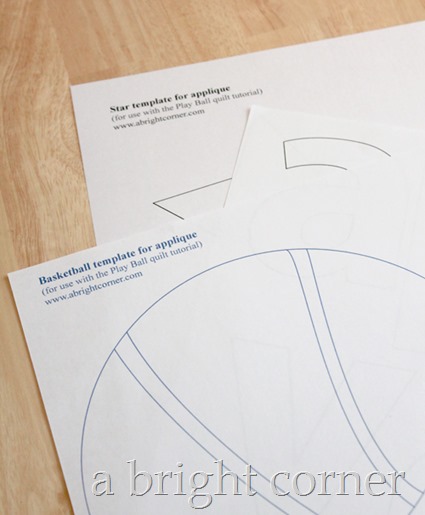
We’ll make the large applique blocks first.  Print the applique templates for the ball, letters and stars.
Play Ball quilt tutorial

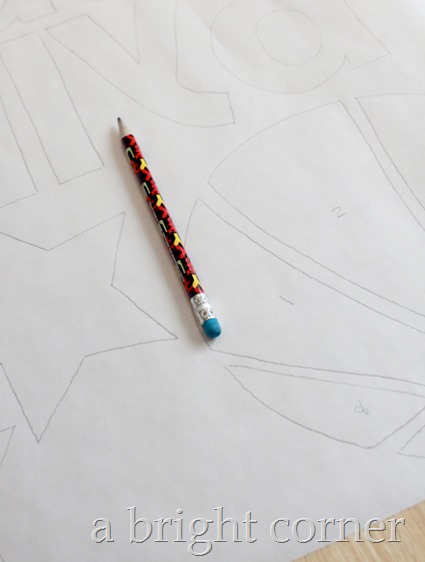
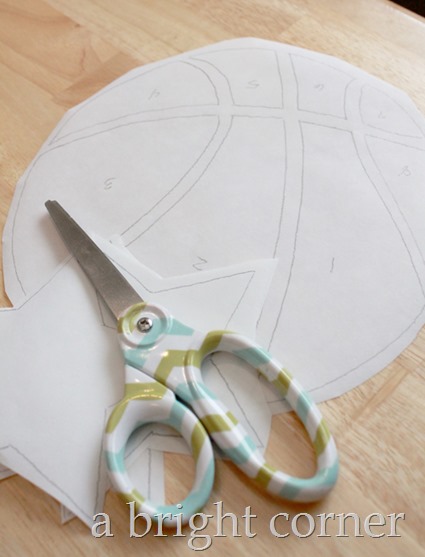
Using a pencil, trace each shape on to the Heat n Bond Lite.  Be sure to trace enough of the letters to spell “play ball.”  Trace as many stars as you want – I did three.  Number the ball segments to help with placement later. 
Play Ball quilt tutorial

Cut around each shape, leaving about 1/4” around each shape.  The ball segments maybe kept together for this step.
Play Ball quilt tutorial

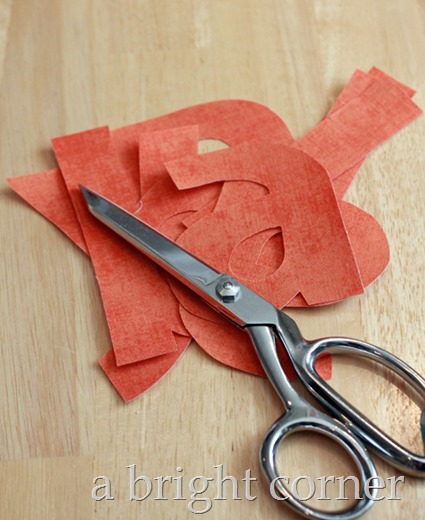
Following the instructions on the package, iron the applique pieces to the wrong side of the solid orange and navy fabrics.  Cut out each shape directly on the lines.  Set aside for a later step. 
Play Ball quilt tutorial

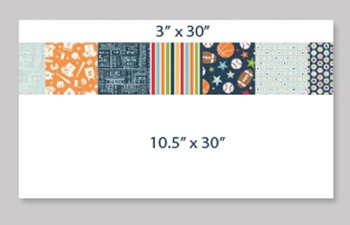
Choose 12 of the 5.5” squares, using a variety of prints.  Sew 5 of them end to end.  Cut one square in half and sew to each end of the strip.  Press seams.  Sew this row to the long side of the 10.5” x 30” solid white.  Press seam.  Sew a 3” x 30” white strip to the other side of the pieced strip.  This makes the right side applique block.
  Play Ball quilt tutorial

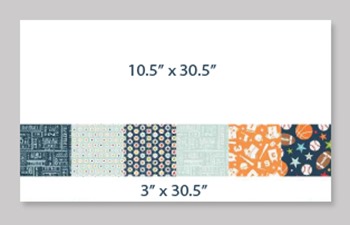
For the left applique block, sew 6 (5.5”) squares end to end.  Press seams.  Sew this pieced strip to one long side of the 10.5” x 30.5” white rectangle.  Press seams.  To the other side of the pieced strip sew a 3” x 30.5” white strip. 
Play Ball quilt tutorial

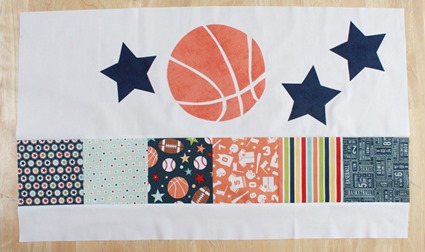
Peel the paper backing from the ball segments and stars.  Place them as shown in the photo with the pieced strip UNDERNEATH the ball and stars and making sure that all pieces are at least 1” from the edges.  Press in place.
Play Ball quilt tutorial

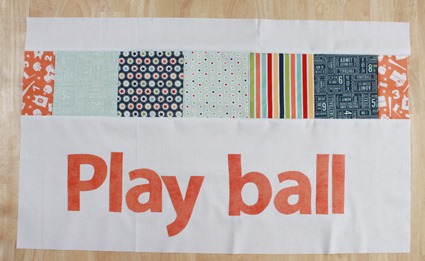
Repeat for the “play ball” this time making sure the pieced strip is ABOVE the lettering.  I used a ruler to make sure the  letters were aligned.  Press letters in place.   
Play Ball quilt tutorial
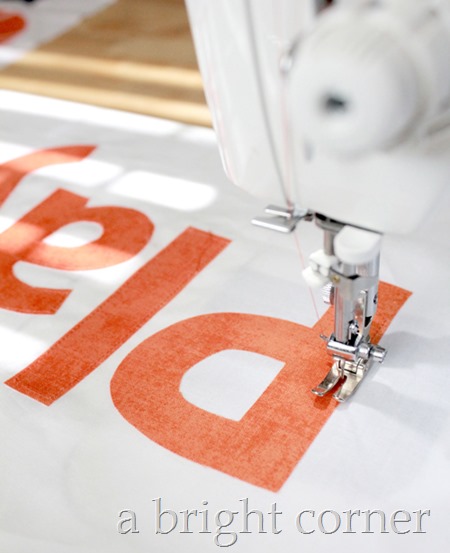
Using a coordinating thread and a straight or zigzag stitch, stitch around each applique shape.  I find it’s SO much easier to do this step now, while the block is smaller rather than waiting until the whole quilt is pieced.  It’s a hassle to wrestle with an enormous quilt top as you’re trying to stitch around a tiny letter!
Play Ball quilt tutorial
Sew the two applique blocks together, using a 1/4” seam.  Press.  You now should have a section that looks like the photo above.  We’ll call this the applique section. 

Next we’ll make the long, pieced rows.  Sort the remaining 5.5” squares into 7 groups of 12 squares each.  Each group will become one row, so make sure each group has a variety of prints.  Play Ball quilt tutorial
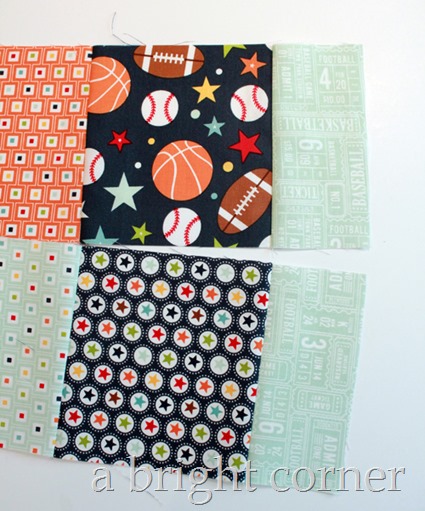
Four of the rows will be offset rows.  To create an offset row, sew 11 squares together end to end.  Cut the remaining 5.5” square in half and sew to each end of the row.  Press seams.  Repeat to make 4 total offset rows.

For the other three rows, sew 12 (5.5”) squares end to end to make a long, pieced strip.  Press seams. Trim 1/4” from each end of the non-offset rows.  All of the rows as well as the applique section should measure 60".


Now for the white strips between rows.  Remove the selvages from the 3” x WOF white strips.  Sew all of the white strips together end to end to make one very long strip.  From this long strip cut 5 that are 60” long.

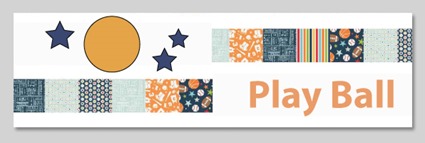
Starting with one offset pieced row, start sewing rows together with long white strips between.  Follow the layout diagram, and add in the applique section where shown.
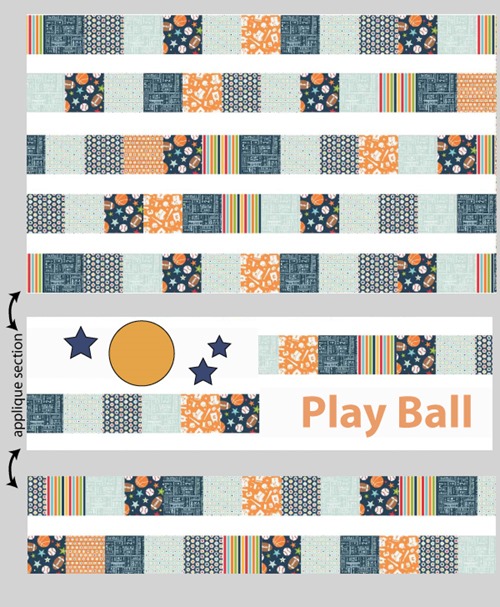
  Play Ball Layout Diagram

Your quilt top is done!    I used the Play Ball Multi Stripe print for the binding – you know I can’t resist a great striped binding, and it adds such a fun finishing touch!
  Play Ball quilt tutorial

Thanks for stopping by!  If you’d like to see more of my tutorials (quilts, quilt blocks and other crafty stuff) you can find them all listed under the “Tutorial” tab at the top of my blog. On the sidebar on the right you'll find a spot to enter your email.  Subscribe by email and you'll receive each blog post here at A Bright Corner right in your inbox so you won't miss a thing!  Happy quilting!


Friday, May 8, 2015

Throw and Baby size Hello Washi

Happy Friday!  I wanted to show you two more Hello Washi quilts that I’ve made in the past few months -

This throw sized version was the first one I made.  It’s made from two charm packs from the Late Bloomers line of fabric (Moda).  I just loved the rich, fall colors in this line. 

Hello Washi quilt pattern

In the pattern, there are instructions for three different block variations. The one I used here is the monochromatic version – with each block made from prints with similar colors.  So the shape of the block stands out more than each individual strip. 

Hello Washi quilt pattern

I backed this quilt in some flannel to make it perfect for using in the fall months. 

Hello Washi quilt pattern

This next quilt is the baby sized version of Hello Washi.  For this quilt I used cuts of yardage instead of precuts.

Hello Washi quilt pattern

It was this version of the quilt that helped me name the pattern.  I thought the bright, geometric strips of fabric looked like my favorite rolls of washi tape.  And washi tape, although cute by itself, is so fun when combined with other strips of washi tape!

Hello Washi quilt pattern 
This line is called Simply Sweet from Riley Blake fabrics.  It’s an older line, but you can still find bundles of it on etsy. 

Hello Washi quilt pattern

Out of all three Hello Washi quilts that I made, this one is my favorite.  I just wish I had made it as a throw size.  When it’s not a part of a trunk show, this one hangs on the wall above my longarm.  It’s so cheery!

You can find PDF and paper patterns for Hello Washi in my shop, and in my Etsy shop.


Wednesday, May 6, 2015

A New Quilt Pattern – Hello Washi

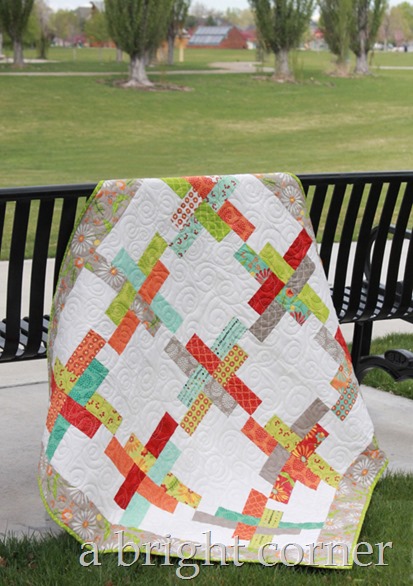
Today I’m sharing one of my new patterns – finally!  This pattern has actually been done for quite some time, but I’ve only had it available as a paper pattern, and not a PDF.  I’m happy to say that it’s now available as a PDF (instant download) now in my shop, here in my ETSY shop.Hello Washi quilt pattern
Hello Washi is jelly roll and charm pack friendly, and has measurements and instructions for four sizes (baby, throw, twin and queen).  The quilt I’m showing today is the baby size and it only needs 1 charm pack to make the center portion of the quilt (you need additional yardage for the background and border). 

Hooray for finding ways to use those favorite charm packs that we’re all hoarding saving!  I know I’m not the only one!

Hello Washi baby quilt

I made this baby size (46” x 46”) Hello Washi quilt from the “Bobbins and Bits” line from Moda.  It was hanging in a local quilt shop for awhile but it has now come home to live with us!  

Hello Washi baby quilt

I’ll be back on Friday to show two more versions of Hello Washi.  You can find the pattern in my shop, and in my Etsy shop. 

Friday, May 1, 2015

Scrappy Strawberry


Have you heard about Lori Holt’s new book, Farm Girl Vintage?  I’ve seen bits of it here and there around Instagram but it wasn’t until I saw it in person and had a friend show me how awesome it is that I had to buy it for myself. 

Farm Girl Vintage book

There are a few projects in the book that are now on my to-do list, but one little block went immediately to the top of the list -

Scrappy Strawberry block 4

I just thought this little strawberry block was so sweet!  I pulled out my bin of 2.5” squares and found my favorite reds along with a few greens.  It didn’t take me long to make the one block. 

Scrappy Strawberry block 3

I quilted it last night, and bound it this morning while I caught up on some podcasts.

Scrappy Strawberry block 2

Sometimes these quick little projects are so fun.  It’s nice to start and finish something in the same week :)

Scrappy Strawberry block

The finished block measures 12” and I added a 2” border all the way around to frame it up. 

Thanks for stopping by!  Have a great Friday (yay for Friday!) and if you haven’t had a chance to enter the book giveaway on my last post, be sure to click back and leave a comment.  Giveaway ends on Monday!

Oh and Lori is doing a Farm Girl Vintage sew along - you can join in over on her blog!  It will be fun to see what everyone creates!

Monday, April 20, 2015

Titch Mini Quilt


Titch mini quilt pattern

This last weekend I finally had the chance to quilt and bind my mini quilt from March.  I first talked about this pattern here.  It’s called Titch from Miss Rosie’s Quilt Co and it sure was fun to make!  I had never worked with such tiny pieces before!

My Titch mini has found a home right next to my Division test quilt – that’s the one I made when I was first testing out my Division pattern.  The blocks are regular size, so I wouldn’t exactly call it a mini-quilt.  I love seeing it up there though!

Titch mini quilt

I’d been kind of frozen with indecision about how to quilt this little thing.  I kept going back and forth with different ideas and then on Saturday I just decided that a finished quilt is always better than an unfinished one so I just started quilting.

  mini quilt
In the end I love what I did simply because it’s done!  One more project crossed off my WIP list for the year – yay! 

So now that the Titch Mini is on the wall, I realize that I need another mini to fill the hole on the top left corner.  Do you have any recommendations for me?  What’s your favorite mini quilt pattern?

Friday, April 10, 2015

Jump Rings Quilt

Jump Rings quilt

Once upon a time there was a Jelly Roll.  (Have you heard this tale before?)  The Jelly Roll was called “Bluebird Park.”  Now this Jelly Roll was a favorite of mine, but no one could tell because it sat on a shelf while I waited for the “perfect” pattern to use it on.  The perfect pattern never appeared.  So one day, I decided to stop searching for the “perfect” pattern and just use the next pattern that caught my eye. 

That pattern happened to be found in this Block Magazine.  In fact, it was the cover quilt.

Block Magazine

The pattern is called Jump Rings and at first I had passed it by because it was written for a layer cake.  Upon a second look however, I realized that it would be pretty easy to use a Jelly Roll instead.  So in the end, our tale has a “happily ever after” ending – the pattern I used turned out to be the perfect pattern after all.  And a finished quilt is better than a stack of fabric, no matter how pretty those fabrics are!

Jump Rings quilt

   The quilt top was fun to make – I sewed it in a couple of days up at Quilt Bliss.  However, because I had held on to the Jelly Roll for so long, I could no longer find the print I wanted to use for the border.  Kind of a bummer.  The quilt was still a nice size without the wide border so I left it off!

Jump Rings quilt

For the quilting I tried something a little new to me, and I did sort of a swirls & shells design.  I like it, but next time I’ll do more “shells” than “swirls.” 

Jump Rings quilt

On the backing is a solid Kona cotton – a pretty peachie color.

Jump Rings quilt

I think I’ll be using the Jump Rings pattern again.  A friend of mine said she made a smaller, baby sized Jump Rings quilt to give as a baby shower gift.  I love that idea!  I like to keep my eyes open for good patterns that use pre-cuts and this one is going into the collection!

You can find individual issues of the Block Magazine here and you can subscribe here.

Friday, March 20, 2015

Quick Curve Ruler tutorial


Have you heard of the Quick Curve Ruler?  It’s a pretty fun tool that makes cutting and sewing curves a breeze.  No really! 

Quick Curve Ruler tutorial

I recently wrote a tutorial about the Quick Curve Ruler for the Fabric Mill’s Blog – you can find it here.

Quick Curve Ruler tutorial 
The tutorial gives you an idea of how the curves are cut (you can use a regular sized rotary cutter!) and pieced (no special presser foot needed!). 

I’ve heard from several people that they own the ruler but have been afraid to try it.  Well, my friends, it’s time!  My advice to you, is to just get the ruler out and make a couple of test blocks.  Don’t be afraid!
 
Quick Curve Ruler table runner

The pattern I made is called “Urban Runner” and it is included with the ruler.  The pattern is actually written on the back and inside of the ruler’s label.  Making a table runner is a great way to get the hang of the ruler – consider it a warm-up.  By the time I finished the runner I felt like I was confident enough to tackle any of the many other patterns that are written for the QCR (Quick Curve Ruler) and there’s so many!!  There are even some free ones available here. 

Quick Curve Ruler table runner

Go and check out the tutorial, and you can also find very helpful videos here.  Let me know if you have questions about the ruler, or the tutorial.  Now go and break out that ruler and give it a try!


Urban Runner pattern using the Quick Curve Ruler


Wednesday, March 11, 2015

Division Quilt – baby size!

A few weeks ago I spotted these Pam Kitty Garden fabrics at a local shop and I fell in love with their pretty Spring colors.  I need some spring color right about now!

Pam Kitty Garden fabrics

I bought a bit of each of them and started work on a baby sized Division quilt.  I like to get everything set up for chain piecing, turn on a good movie and then just sit and sew for awhile.  So relaxing!

Division quilt pattern in baby size

With only 9 blocks, this quilt came together pretty quickly- 

Division quilt pattern

The tough part is usually deciding on the quilting, and then what to bind it with!

Division quilt pattern

After debating for awhile, I choose to quilt it in some little loops with a few flowers scattered in as well.  And I bound it with the same dot print that I used in the quilt blocks.  Frames it up so nicely!

Division quilt pattern

This quilt is visiting a quilt shop right now as a display along with her big brother – the throw size Division quilt.

Division quilt pattern

You can find the Division pattern for sale as a PDF here, or here.  Paper versions of the pattern available here!

[wholesale patterns available as well - email me for details - abrightcorner (at) gmail (dot) com]

Related Posts Plugin for WordPress, Blogger...